


- If you have not used ScanNCut Canvas before, create your free account. If you are unsure how to do this, click here to watch this video from Brother. Create an account, then log in.
- Once the software opens, you will see dozens of Canvas Projects from holiday decorations and gift giving to creating cards and decorative fabric projects. The possibilities are endless.
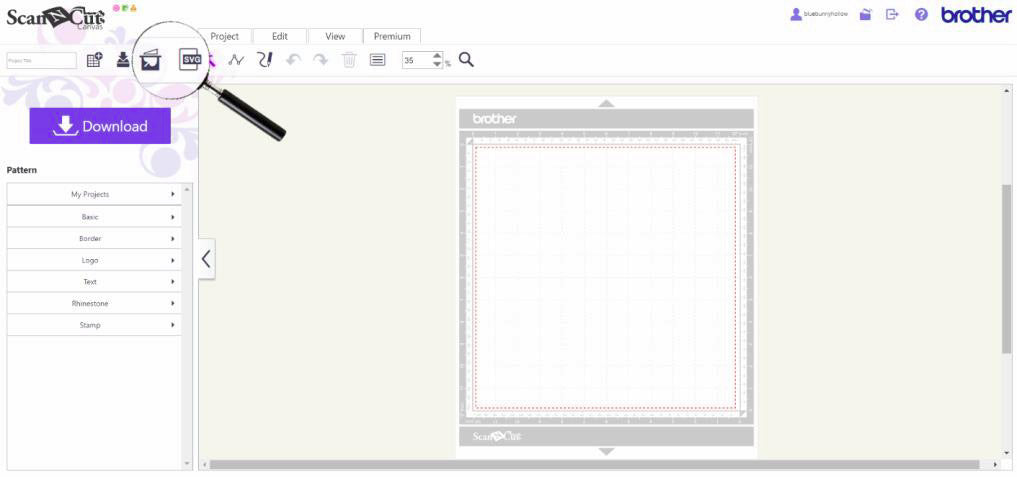
- Left click on the first box that says NEW to open the main screen. You will see an image of a mat, tools at the top of the screen and patterns on the left.
- In Example 1, the icons you will use to load your file are magnified.
- Image Tracing is used to open JPG, PNG, GIF and BMP files less than 5MB.
- Import is used to open SVG, DXF and FCM files less than 2MB.
- Download the file “Daisy” at the end of this tutorial. Save the file to your computer.
NOTE: If you have not created a folder for classes you attend, either online or in the store, now would be a good time to create one. Knowing where you put your downloaded files for classes makes it much easier to find them when you need them. If you are unsure how to create a new folder you can google “how to make a folder in windows” or “how to make a folder in window 10” and you will find great step by step instructions. - Select Image Tracing from the ScanNCut Canvas menu. Your screen will look like:
- Select Choose File in the top left corner. Select the file “Daisy” that you saved at the beginning of this tutorial. Example 3 shows the daisy in the viewing area. It also shows the size of the artwork.
- If you click Preview in the lower right corner, the software will display where the cut lines will be.
- The outline/cutline is displayed in the upper left corner of the mat.
- In the upper left corner is the field Project Title.
- Left click in this field and enter Daisy.
- Left click Download. The download screen pops up.
- In the download screen, you have the ability to save the design to your computer or Wi-Fi it to you ScanNCut.
- If you save it to your computer, the file is placed in your download folder. You can copy or send this to a usb drive then place the usb drive into your ScanNCut.
- If you send the daisy via wifi, the screen that pops up lets you know the file is ready to transfer.
- Turn on your ScanNCut, touch the screen, click OK to set the cutting head to the start position. Touch Pattern , then touch Import Data. The daisy is in the work area of your ScanNCut screen and is ready to cut.
- Select Import from the ScanNCut menu. Your screen will look like:
- Download the file “Hibiscus” at the end of this tutorial. Save the file to your computer.
NOTE: If you have not created a folder for classes you attend, either online or in the store, now would be a good time to create one. Knowing where you put your downloaded files for classes makes it much easier to find them when you need them. If you are unsure how to create a new folder you can google “how to make a folder in windows” or “how to make a folder in window 10” and you will find great step by step instructions. - Select Choose File located in the top left corner.
- Select the hibiscus file and click Open. Notice it only shows the name of the file, but no picture. Click OK.
- The hibiscus is now in the work area of ScanNCut Canvas.
- In this example, the hibiscus has 5 sections to the artwork. Each section can be moved independently from one another. NOTE: If you had a jpg, png, etc., you would also have separate sections to your artwork. This will give you more options to arrange the details of your cut to your own specifications.
- At this point the pieces are not grouped, and when we send it to the ScanNCut the sections could be moved out of position. If you want to move the hibiscus to a specific spot, you would have to move the individual pieces or go to Editing on the ScanNCut, select and group the hibiscus sections. So, let’s group it in Canvas so it is ready to go when it is sent to the ScanNCut.
- Select the Edit tab. In the dropdown menu, choose Select All.
- This will put boxes around all the pieces of the hibiscus.
- Select the Edit tab and choose Group.
- The hibiscus is now grouped.
- In the Project Title enter Hibiscus, then follow Steps 12-18 to send your cut file to your ScanNCut.
Enjoy your sewing (and cutting) adventures!!
Lana L Jones
Educational Consultant

