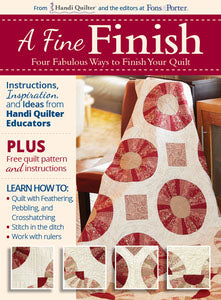
There is so much I love about my job as the manager of Sew Fun. One of the many things is the opportunity to see new products. Sewing curved pieces together can be a bit of a challenge, but I created a new quilt top start to finish in one afternoon, a total of 51 blocks, using the Drunkard’s Path templates. And I didn’t use a single pin while sewing the curved pieces together!
I debated on fabrics, but decided to use one of my 10” square packs in bright colors. This group of fabrics is far outside my “comfort zone”, but I’m so happy with the result. I found cutting 3 layers of fabric at a time worked best, particularly for cutting the slits on both template pieces. Both templates will be able to be cut from a 10” fabric square.
A 45mm or 28mm rotary cutter is recommended. I used my Quilters Select 45mm rotary cutter and it worked great. Cut around each template piece, then cut tiny little slits in all the indicated locations. You’ll be cutting about a 1⁄8” slit. Just keep cutting your fabric and sorting the side A and side B into piles. And then you’re ready to start sewing - that’s the FUN part.
Use a 1⁄4” foot and a straight stitch plate for best results. Set your machine for needle down and have the pressure foot lift slightly when you stop stitching to make the pivoting easier. Then just start matching the slits from piece A and piece B. Occasionally I would find that the slits didn’t match as easily and every time I found I had not actually stitched to the slit, but a few stitches short. I simply placed 2 - 3 more stitches and voila!, the next slit matched perfectly! This could not have been more easy and best of all, no pins to place and remove which made the process so fast.
I had no layout in mind when I started this fun project. Just sewed up all the blocks I had cut. I ended up with 51 as that’s how many 10” squares I started with. Ended up only using 48 on the top, the other three I will use as part of the backing. Once I sewed all the blocks I searched on Google for Drunkard’s Path layouts. Wow!! There are a lot of options. Since the fabrics I used were a wild group with very few matching fabrics, I found what I thought was perfect. I sewed 4 of the blocks into a new block, forming a circle. Created 12 of this larger blocks, which I did cut down to 15” squares, then sewed 3 blocks together into rows, with 4 rows. It’s a perfect lap size quilt which I plan to use on my rocking chair on my deck this summer. It’s bright and happy. I’m not going to add any borders, just bind it. And I’m going to quilt it on my embroidery machine using the Edge to Edge Quilting book that Ann & Gail showed you during March Sew Fun. Now onto my next new sewing adventure! We can order the templates for you so you can make your own. I guarantee, this is the easiest way I’ve ever sewn a Drunkard’s Path block. The set I used made a 8” finished block, but they also come in 4” and 6” sizes. The finished size of this top is 45” x 60”.
Happy Sewing,
Lauri Kendall
Sew Fun Manager
