Why do I need these? I am so glad you asked.
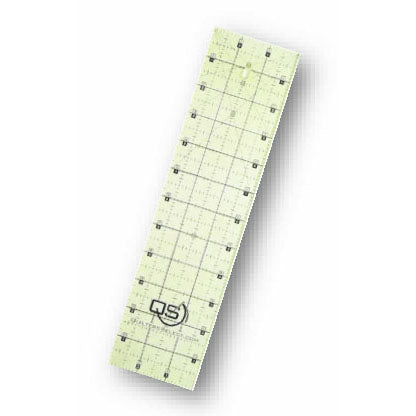
Let’s start with the Quilter’s Select 3x12 ruler. If you have looked at these rulers, you will see they have easy-to-read numbers going in both directions. No more flipping rulers to get to the correct side. Measurements are exact to the edges of the ruler, and the pale yellow makes it easy to see the markings on almost every fabric. But the best part of these rulers is in the non-slip surface of the back of the ruler. When you cut with these rulers, they do not slip on your fabric. You no longer need to add grippy, sticky, filmy stuff to the back of the ruler… it just stays in place. Sweet!!!
AND… The Quilters Select Ruler is also great for… RULER WORK!
Yes! Sewing or quilting a straight line, cross-hatching, etc., isn’t always easy, and at times we have a slip or two that we have to un-sew. Using the Quilter’s Select Ruler 3x12 ruler eliminates this frustration, because we will stitch along the edge of the ruler for a perfectly straight line… AND… the ruler is not going to slip. Yes!
- First determine where you want the stitching to be and how far apart you want the lines of stitching if you are doing multiple lines, as in cross-hatching.
- Mark your first line, use a seam line or previous line of stitching.
- Select your favorite sewing foot (NOTE: You cannot use the J foot with leveling button as the button hits the ruler), or the Ruler Foot from Westalee/Sew Steady if you prefer to free-motion stitch your lines.
- Measure from the needle to the left edge of the ruler. In many standard feet, this will be 3/8”. The measurement for the Ruler Foot would be 1⁄4”.
- Now we need to do the math. Let’s use 1” separation between lines of stitching. With the measurement from Step 4, we will add 5⁄8” to equal 1”. NOTE: Your measurement may not be the same if your “needle to foot edge” is different, so adjust numbers as needed for your foot choice.
- Place the 5⁄8” mark of the Quilter’s Select Ruler on the line you are using from Step 2. Make sure it matches the length of the ruler.
- Set your foot next to the right edge of the Quilter’s Select Ruler.
- Set your machine for needle down, if you have that feature. This ensures you keep your place when you stop and move the ruler for long lengths of stitching.
- Sew, keeping the foot snugged up against the edge of the ruler. The Quilter’s Select Ruler will not shift.
- If you have a long length to stitch, stop when you reach the end of the ruler, move the Quilter’s Select Ruler, match the lines, and continue stitching.
- If you want your stitching line to be at an angle, the use the 30°, 45°, or 60° marked angles on the Quilter’s Select Ruler.
- Place the angle you want along the marked line from Step 2 and stitch the first line.
- Continue as you did before and stitch the remainder of your lines.
- How cool is that?
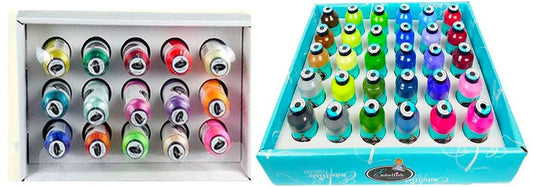
So, what is so great about the Quilter’s Select 80wt Para Cotton Thread? And why do I need these? More great questions.
It is a polyester thread so it is strong. It is perfect for fine machine quilting because of the thinness. It can be used for hand quilting, or machine embroidery. Paired with the 80wt pre-wound bobbin it is a match made in stitching heaven, as you can stitch forever with one bobbin and one spool of thread.
BUT… I have discovered an additional way to use the Quilter’s Select 80wt Para Cotton Thread. I do a lot of experimenting with embroidery designs and I love applique with satin stitches, bean stitches (triple stitch, 5, 7, or 9 stitch), decorative stitches, etc. The placement and tack down stitches are usually done with the 40wt thread you are using with the embroidery. This is additional bulk under the satin stitch, bean and decorative outline stitches, and the tack down stitch can be a run, double or triple stitch depending on the digitizer. That’s a lot of thread!
I wanted a less visible placement and tack down line under the final stitching of the applique. So recently, I started using the 80wt thread for all my placement and tack down lines and the results are fabulous. I will use a neutral color with a satin stitch as it will not be seen. But, with the bean and decorative stitch appliques, I will match the 80wt thread to the background fabric, the color of the applique, or the color of the thread being used to make it less visible and less bulky, and a much cleaner look to the finished applique!
I love this thread and you will too!
~Lana L Jones
Educational Consultant
Quality Sewing and Vacuum