You don't have to be super crafty to enjoy etching glass. There are so many ways you can use glass etching and I would like to share with you one of my all-time favorite projects. It is fun, useful and makes amazing gifts!
Over the years I have lost many of my favorite dishes to social gatherings. I am sure it has happened to you too. You go to a family dinner, a work potluck or church function with something home-made and delicious to share. You worry so much about what you are bringing you didn't remember to buy disposable pans you can leave behind. This means you use your good bakeware and many times don't remember to take it home with you. If you are like me, this has happened more than once. That is until I learned about the simple art of etching glass.
Glass etching has saved me from having to replace all my baking pans and allows me to give fun personalized gifts for any occasion.
When we recently brought in etching kits, I was excited to stock up on my glass etching supplies and picked one up right away. The kit includes everything you need including etching cream, craft knife, detail pick, self-adhesive vinyl sheets and transfer sheets. The kit comes complete with all the tools needed to create your vinyl designs. However, I opted to use my ScanNCut to create my stencil. Using the ScanNCut makes creating vinyl templates so quick and easy.
I also make sure to keep my Brother ScanNCut Settings, Tips & Tricks book handy. This book has become my go-to guide when creating designs on the ScanNCut. Each time I cut a new material I note all the important details such as the material I am using, prep work, the mat I used, blade, blade setting etc. in the book. This allows me to quickly prepare my materials and get my stencils created quickly using settings I know will work for my project.
The trick with creating stencils for glass etching is remembering you will be working with negative space. This means the sections you cut out and remove from your design will be the parts etched. When doing letters and fine details it is important to remember the insides of letters and designs that are essential to make your finished project look good.
Once your stencil has been created you need to adhere it to the transfer paper. Cut the transfer paper slightly larger than your stencil and press firmly to secure the stencil to the transfer paper making sure the small areas are transferred. If you are going to be adding your design to an item that is curved, make sure to cut slits in the edges of the stencil. This will allow you to wrap the stencil around curved areas and have it lay flat against a rounded surface.
Before you place your stencil onto the glass make sure your glass is clean and dry, then you can apply the stencil. Peal the white backer off the yellow vinyl stencil. This will uncover the sticky backing on the vinyl.
Again, if you have small pieces in your design make sure you take the paper off those pieces, so they transfer onto the glass. Place the stencil securely to the glass item you are adding the design to. Gently but firmly press the stencil onto the glass. You want to be sure to remove all air bubbles by pressing with a squeegee or ruler. This will ensure your vinyl adheres to the glass and will prevent the etching cream from seeping into areas it shouldn't. Gently peel back the transfer paper making sure the vinyl does not come up with it.
When etching a baking pan you have several options of where to place your etching design. Over the years I have placed etch on the handle, side of the dish, inside the pan and the back of the pan like you see here. While doing the design on the inside of the pan allows you to read it when looking into the pan it can also cause food to get stuck in the design which I didn't like. The bottom of the dish has become my "standard placement" on gifts as it allows you to read the name easily and when the pan is washed and set out to dry you see the name right away.
You are now ready to add the etching cream. Using a small paintbrush, cover the areas of the design you want to have etched. For best results apply the etching cream in a thick layer. Let the cream sit for 15 – 20 minutes to work into the glass. If you want the etching to be darker or deeper you can leave it on longer. The etching cream can be reused, so don't simply wipe off the cream when time is up. I like to use a dry toothbrush to get the excess etching cream off the project and back into the bottle. This allows you to control where the cream goes and ensure it does not get on any part of the glass you don't want etched. Once most of the etching cream has been removed with the toothbrush, wipe any remaining cream off with a dry paper towel and discard. Avoid getting the etching cream on your hands. If you do wash them with soap and water right away to prevent skin irritation.
Before you remove the stencil wash the glass with dish soap and water. This will remove any remaining etching cream and keep your lines crisp when you remove the stencil. Dry the glass with a towel and then remove the stencil to reveal your design. You now have a baking pan that you are sure to have returned!
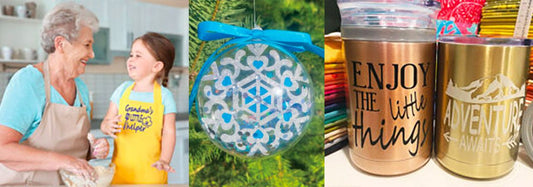
Custom baking dishes make excellent gifts for house warming, weddings, Christmas or any time. They also will ensure you get your pan back from your next social gathering. Other items that can be etched for gifts include wine glasses, photo frames, mirrors and so much more. Get creative and make fun gifts of your own with etched glass.
Happy Crafting!
~Carrie Estrada